• Info@BridgeUpholsteryAndDrapery.com
  • |
  • 417.429.1243

Custom Draperies Curtains Shades Window Treatments and Furniture Upholstery and Reupholstery in Springfield, MO

  • Home
  • Services
    • Custom Draperies
    • Custom Upholstery
    • Custom Shades & Blinds
    • Areas We Serve
  • View Our Work
    • Sofas
    • Chairs
    • Ottomans & Benches
    • Pillows, Window Seats & Outdoor Cushions
    • Draperies
    • Shades & Blinds
    • Client Testimonials
    • Items for Sale
  • About Us
  • Bridge Blog
  • Contact Us

How to Miter Corners When Sewing with Tape Trim

March 31, 2016 by Bridge Upholstery & Drapery

In a previous post, Adding Trim to Your Upholstery and Drapery Projects, we discussed many uses for tape trim.  This post will give you detailed instructions for mitering corners when adding tape trim to square or rectangular projects like pillows or Roman Shades.

Starting with a Mitered End

How-to-miter-greek-key-trim-tape 061

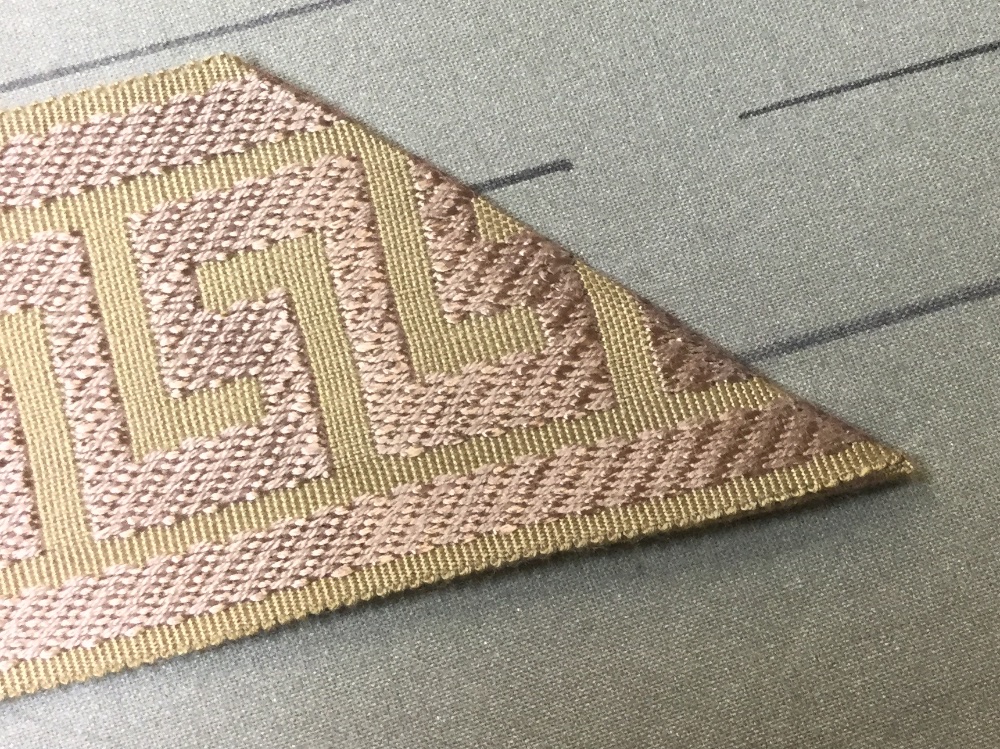
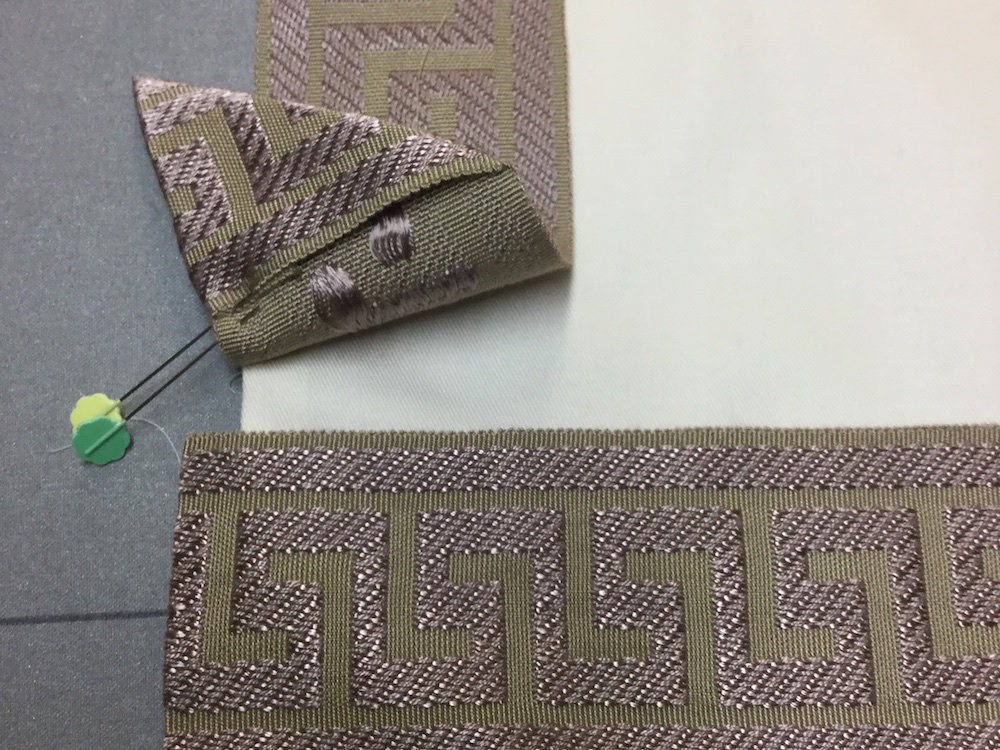
The first step when sewing with tape trim is folding your tape in a way that conceals the cut edge and makes a mitered end to be used at the starting (and finishing) corner of your design.

Before beginning to miter the ends of your tape trim, you’ll need to get your iron set to the proper temperature.  Preheat your iron on the synthetic setting (Level 2 on our iron) and test it on an inconspicuous part of the tape.  Make sure your iron isn’t melting your tape.  If the iron isn’t sufficiently creasing your tape, you’ll need to increase the temperature until it makes a crease but be sure not to turn it up so high that you melt your tape.  An iron will really help you as you miter your tape trim corners.  It will not only help you keep your tape folded to your design, but it’ll give you better looking results too.

Step 1.  Fold under the tape at a 45 degree angle, leaving a 1/2 inch tail sticking out of the side of the tape.  Press the fold with an iron.How-to-miter-greek-key-trim-tape 055

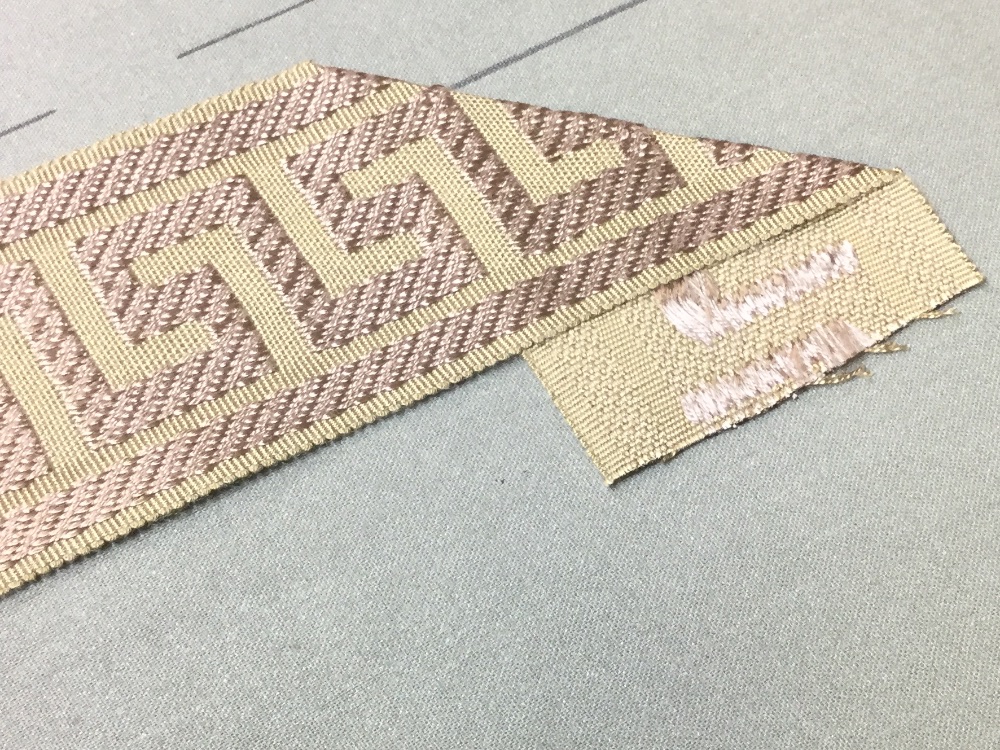
Step 2.  Fold down the top of the tail like you’re making a paper airplane.  Press the fold with an iron.How-to-miter-greek-key-trim-tape 056

Step 3.  Open up the fold you made in Step 1.How-to-miter-greek-key-trim-tape 060

Step 4. Fold the tail in to enclose the cut edge.  Line up the fold you made in Step 3 with the now open crease of the fold made in Step 1.  Press the fold with an iron.How-to-miter-greek-key-trim-tape 059

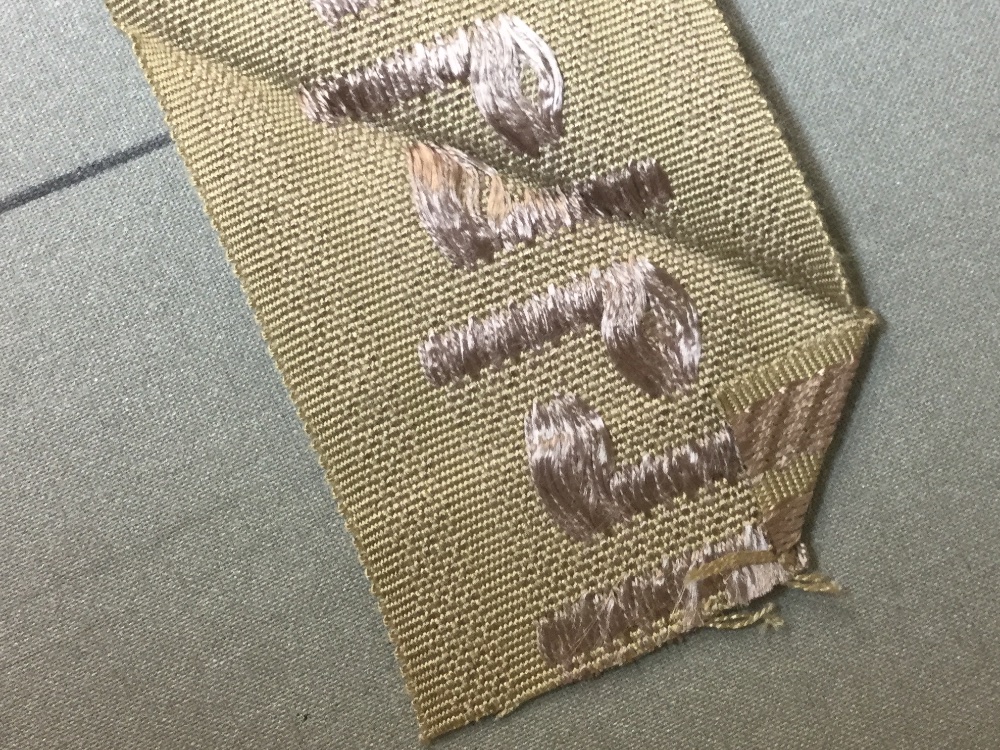
Step 5.  Refold the original fold made in Step 1 and admire your mitered end.  This will be the start and end of your mitered pillow corner.  Press the tape one more time just to secure it.How-to-miter-greek-key-trim-tape 061

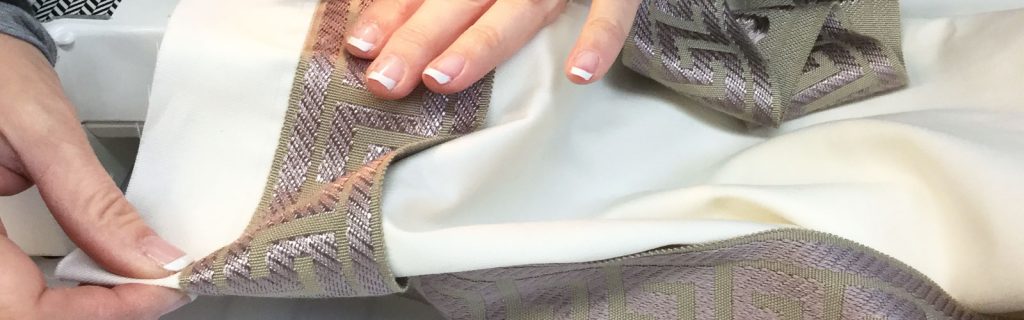
Placing the Tape Trim on your Pillow

How-to-miter-greek-key-trim-tape 067

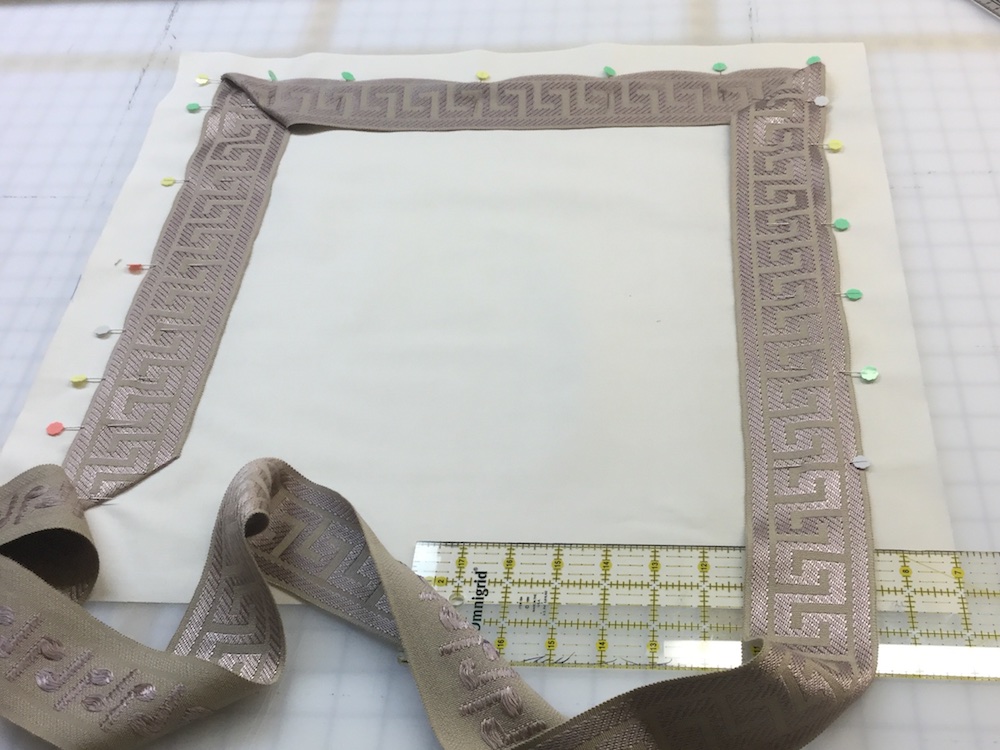
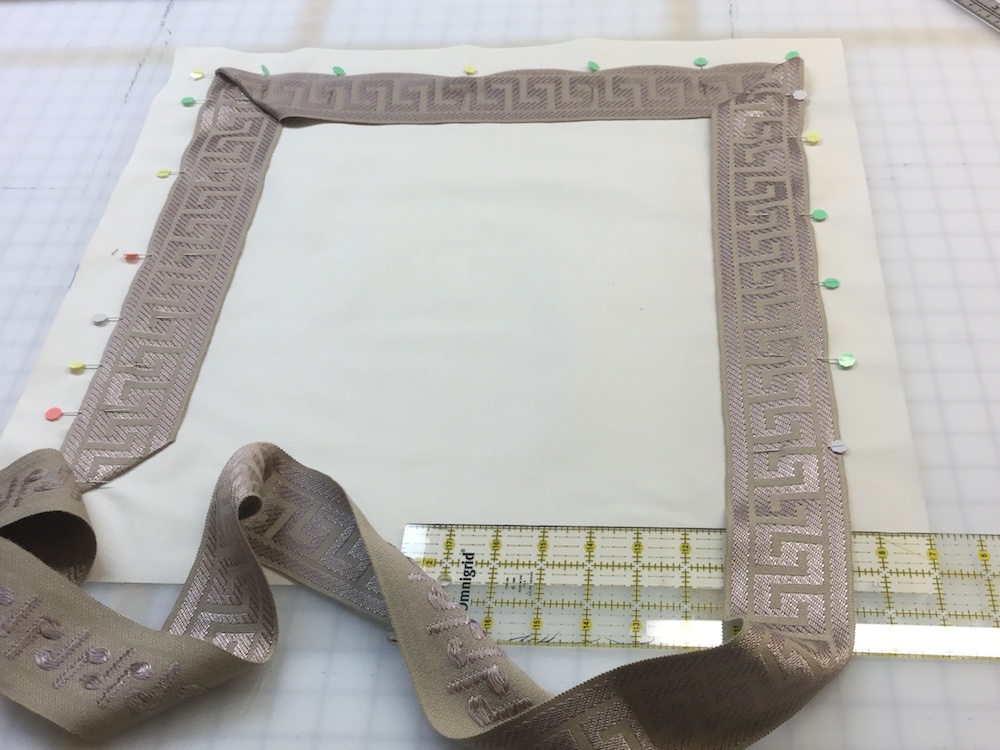
Above, you’ll see a pillow front with the tape pinned in place.  The mitered end we created is in the bottom left hand corner.  For this pillow design, we wanted the tape to be 1 inch inside the edge of the finished edge of the pillow, so we pinned the tape 1 1/2 inches from the cut edge of our pillow front to allow 1/2 inch for a seam allowance.

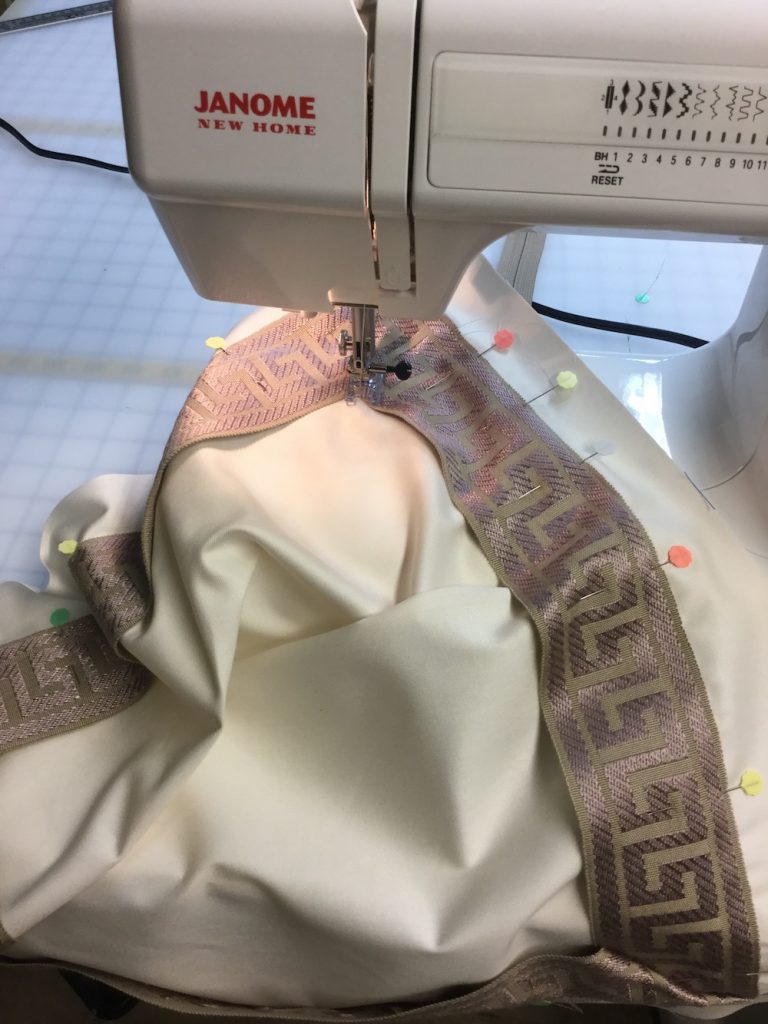
Sewing the Tape Trim to your Pillow FrontHow-to-miter-greek-key-trim-tape 068

The photo above shows the starting and ending corner.  (Don’t let this picture confuse you – it’s actually a Roman shade, which is why the 1 1/2 inches of fabric to the left of the tape is missing.)  Begin sewing at the double pins, leaving the mitered end unsewn so that you can hide the finishing end of the tape under your mitered end.How-to-miter-greek-key-trim-tape 069The photo above shows the mitered end is not sewn yet.  You’ll start sewing at the double pins.  In this example, you’d start sewing at the double pins and sew up the left side of the tape.  sewing-curtainsSo once you have your tape pinned in place around your pillow front, sew around the outside of the tape trim until you get to your first corner.  Pivot at the corner and then continue sewing along the edge until you get to your second corner.  Pivot again and sew that edge, pivot a third time and sew until you are 2″ from the last corner.  Cut your tape about 1/2″ longer than the outer edge of your trim (look back at the double pin photo above for where to cut) and fold it under.  Press the fold with an iron to make sure that it perfectly lines up with the outside edge of the mitered end.  Sew the remaining 2″ of tape to the corner, line up and pin your starting mitered end down at the corner, pivot and sew back to the location of the double pins.

Now the outer perimeter of your tape trim is sewn down.  Take your pillow over to the ironing board and give it a good press.  Be careful to line up the mitered corners, keeping the inner corners lined up so that the inner perimeter of the tape is square.

custom-greek-key-trim-tape-pillows-roman-shades 075To finish sewing the trim to the pillow front, sew around the inner perimeter and sew down each mitered fold individually.

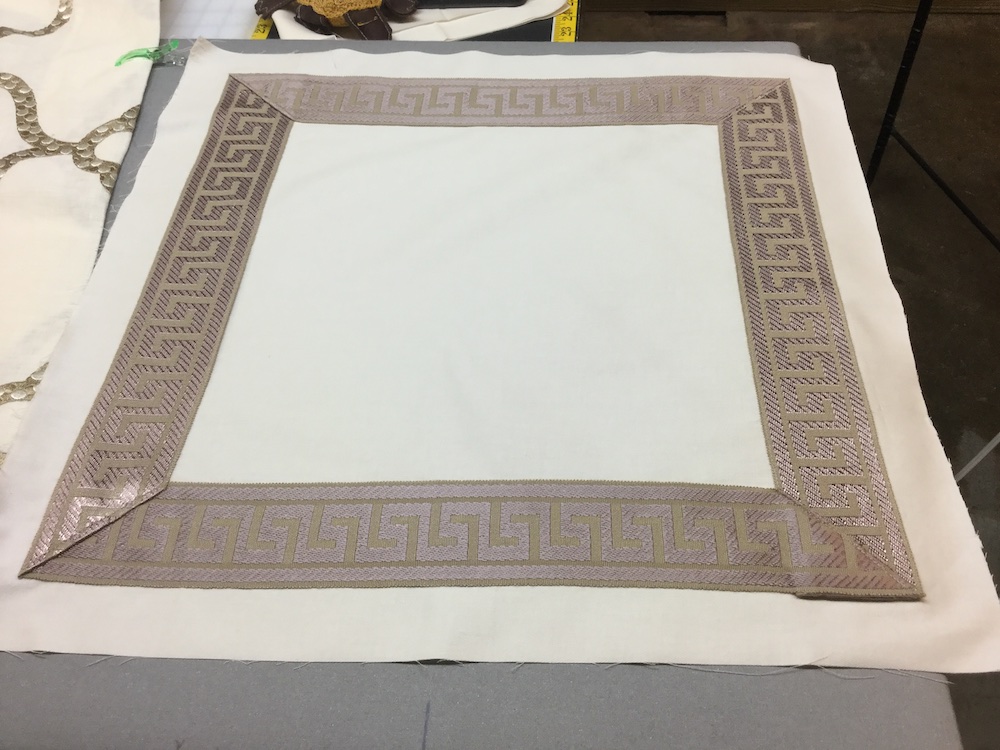
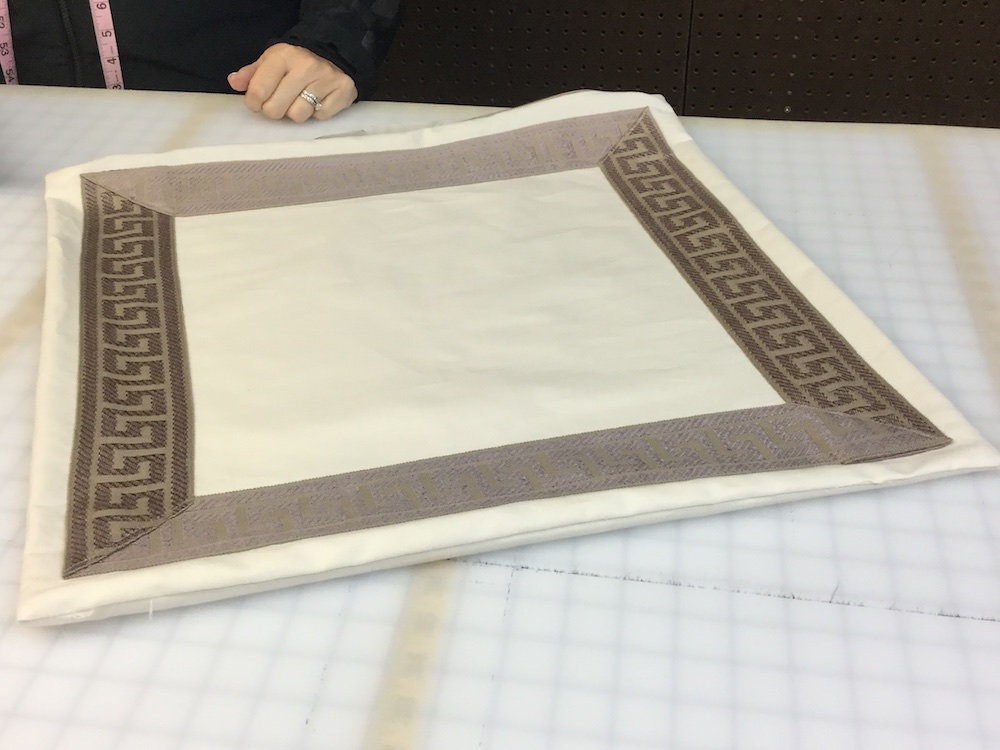
Finished Pillow FrontHow-to-miter-greek-key-trim-tape 071

Your pillow front is ready to be made into a finished pillow!

Example of a Finished Pillow

custom-greek-key-trim-tape-pillows-roman-shades 051 (1)

We’d love to help you with your next upholstery or drapery project.  Contact us to get started!


Filed Under: Articles & Resources Tagged With: custom pillows, Design Considerations, Framed Pillow Front, Greek Key, greek key pillow front, Greek Key Roman Shade, Greek Key Tape, Greek Key Trim, How-to Miter corners, Mitered Corners, Mitered Trim

Recent Articles and Projects

  • Bridge was Featured in 417 Home Magazine!
  • Bridge Welcomes New Employees Adam and Allison!
  • The Big Reveal! Bridge Upholstery and Drapery’s New Storefront!
  • Big News! Bridge Has Moved to 202 E Commercial Street!
  • Reupholstery of Living Room Furniture | Custom Home on Table Rock Lake
  • The Quest for an Industrial Sewing Machine
  • Custom Upholstery of Unique Velvet Chair and Creation of Matching Ottoman
  • How to Miter Corners When Sewing with Tape Trim
  • Adding Trim to Your Upholstery and Drapery Projects
  • Custom Upholstery of Vintage La-Z-Boy Recliners | Springfield, MO
  • How to Design Drapes using Patterned Fabric | Historic Springfield Home
  • Custom Swivel Chairs and Sectional Couch Repholstery | Springfield, MO
  • Custom Drapes Curtains and Shades | Springfield, MO

      Contact Bridge Now

      * indicates required field

      Acceptable file types: doc,docx,pdf,txt,gif,jpg,jpeg,png.
      Maximum file size: 5mb.
      CAPTCHA
      Refresh

      Connect with Bridge

      Bridge Upholstery and Drapery
      202 E Commercial St
      Springfield, MO 65803

      417.429.1243
      Info@BridgeUpholsteryAndDrapery.com
      BridgeUpholsteryandDrapery.com

      Like and Follow Bridge on Social Media!
      Facebook
      Facebook
      fb-share-icon
      Pinterest
      Pinterest
      Pin Share
      Houzz
      Houzz
      Twitter
      Visit Us
      Follow Me
      Tweet

      Our Services

      • Custom Drapes
      • Custom Curtains
      • Custom Shades
      • Custom Window Treatments

      • Custom Upholstery
      • Custom Reupholstery
      • Furniture Upholstery
      • Furniture Reupholstery
      • Furniture Renewal
      • Furniture Restoration

      Areas We Serve

      Bridge Upholstery and Drapery is proud to provide custom draperies, curtains, shades and window treatments as well as furniture upholstery, reupholstery, renewal and restoration services to the greater Springfield and Southwest Missouri area.

      Serving Springfield | Republic | Willard | Fordland | Rogersville | Branson | Kimberling City | Nixa | Ozark | Clever | Sparta | Spokane | Battlefield | Marshfield | Strafford | Bolivar | Highlandville | Lebanon | Fair Grove | Buffalo | Greenfield

      Copyright © 2021 — Bridge Upholstery & Drapery


      Custom Draperies Curtains Shades and Window Treatments | Custom Furniture Upholstery and Reupholstery


      Serving the Greater Springfield and Southwest Missouri Area


      All rights reserved.